ESP8266 Projects
Note all the current ESP8266 projects use Thinger.io as an IoT platform. Thinger was chosen because of their “2 free devices per user” policy which allows for long-term maintenance without any cost. Also, among the free-to-use ones, it was the most intuitive and elegant in implementation. For this reason, the first chapter of this page will be dedicated to thinger connection
Thinger IO
Thinger.io is a platform which allows for communication between IoT devices through the web and the REST API. It provides a very robust and easy-to-implement API.
Setting up a Thinger.io account
Go to thinger.io and click on “Sign up”. Fill in all the fields and choose the free membership. Confirm your email address through the link that will be sent to your inbox.
Once you gain access to the dashboard, select the tab “Devices” on the left, then click “Add Device”. Choose a name for the device, we’ll use esp8266 as an example here (remember to choose a different name for each chip you are connecting to the account). Make a note of the “Device Credential” field. Click on the name on the device to access its configuration page. On the device page, in the “Device Tokens” box, click on “+ Add”. Give the new token a name, then choose your settings. For these projects, my advice is to make non-expiring tokens that control all the resources on the device. This allows for easier software implementation and quicker extension of functionality. Make a note of the token (it’s the rsa-looking string on the bottom of the box).
Setting up the Arduino IDE
Once you have the username and token, it’s time to implement functionality in the Arduino IDE. To do this, it’s necessary to import the _thinger.io _ library through the Library Manager in the IDE.
For the purpose of these projects it’ll be necessary to have installed the esp8266 board. Add a line to your “additional boards manager” in preferences as follows to do this
http://arduino.esp8266.com/stable/package_esp8266com_index.json
Then, in the boards manager (Tools > Board > Boards manager), searching “esp8266” will yield the option to install all the necessary files and programs. Depending on your system, you might need to install esptool.
Interfacing Thinger with the project
#include <ThingerESP8266.h>
#include <ESP8266WiFi.h>
#include <ESP8266mDNS.h>
#include <WiFiUdp.h>
#include <ArduinoOTA.h>

#define USERNAME "yourUsername"
#define DEVICE_ID "esp8266 (or what you chose before)"
#define DEVICE_CREDENTIAL "The device credential from before"

#define SSID "Your SSID"
#define SSID_PASSWORD "Your Password (I hope it's a WPA2)"

ThingerESP8266 thing(USERNAME, DEVICE_ID, DEVICE_CREDENTIAL);
As is evident, we include a number of libraries. All of these came either when the board was installed or when the Thinger library was. We also need to define some constants that will be used by the MCU to connect to the wifi and to the Thinger.io platform.
Lastly, we initialize the thing object of type ThingerESP8266.
Now all that’s left to do is initialize the data buffers that will be accessible from the platform. Into void setup() goes the code:
thing["millis"] >> outputValue(millis());

thing["led"] << digitalPin(LED_BUILTIN);

thing["dostuff"] = [](){
	doSomeStuff();
};

thing["color"] << [](pson & in) {
	red = in["red"];
	green = in["green"];
	blue = in["blue"];
	bright = in["bright"];
};
We also need to call thing.handle() every time loop() runs.
This code allows to do some different operations.
Every thing instance allows us to specify an editable field in order to take data in and out of the MCU.
Specifically:
-the first thing allows the API to access some data, in this case the output of millis()
-the second allows us to write a boolean value to the pin specified to digitalPin
-the third is an example of how we would define some function to be called remotely from the API
-the fourth one allows to write an array of values, each specified by the tag included within quotes in["something"]
It’s important to remember that the type of in is pson.
Getting data to the MCU
To get data to the unit it’s necessary to make a request to Thinger.io. The easiest way is by making a POST (GET for function calls) request via any service (easy to integrate with IFTTT Webhooks). The request shall be crafted as such:
URL = 	https://api.thinger.io/v2/users/andreachiara/devices/esp8266WLED/<field>?authorization=<token string>
BODY =	{
		in : true
	}
token string is the device token from before, the rsa-looking long one.
field is the value that allows to specify into which data field to write (e.g.: "color", "dostuff", "led")
the data can then be use in the form:
void loop()
{
	digitalWrite (PIN_RED, red);
}
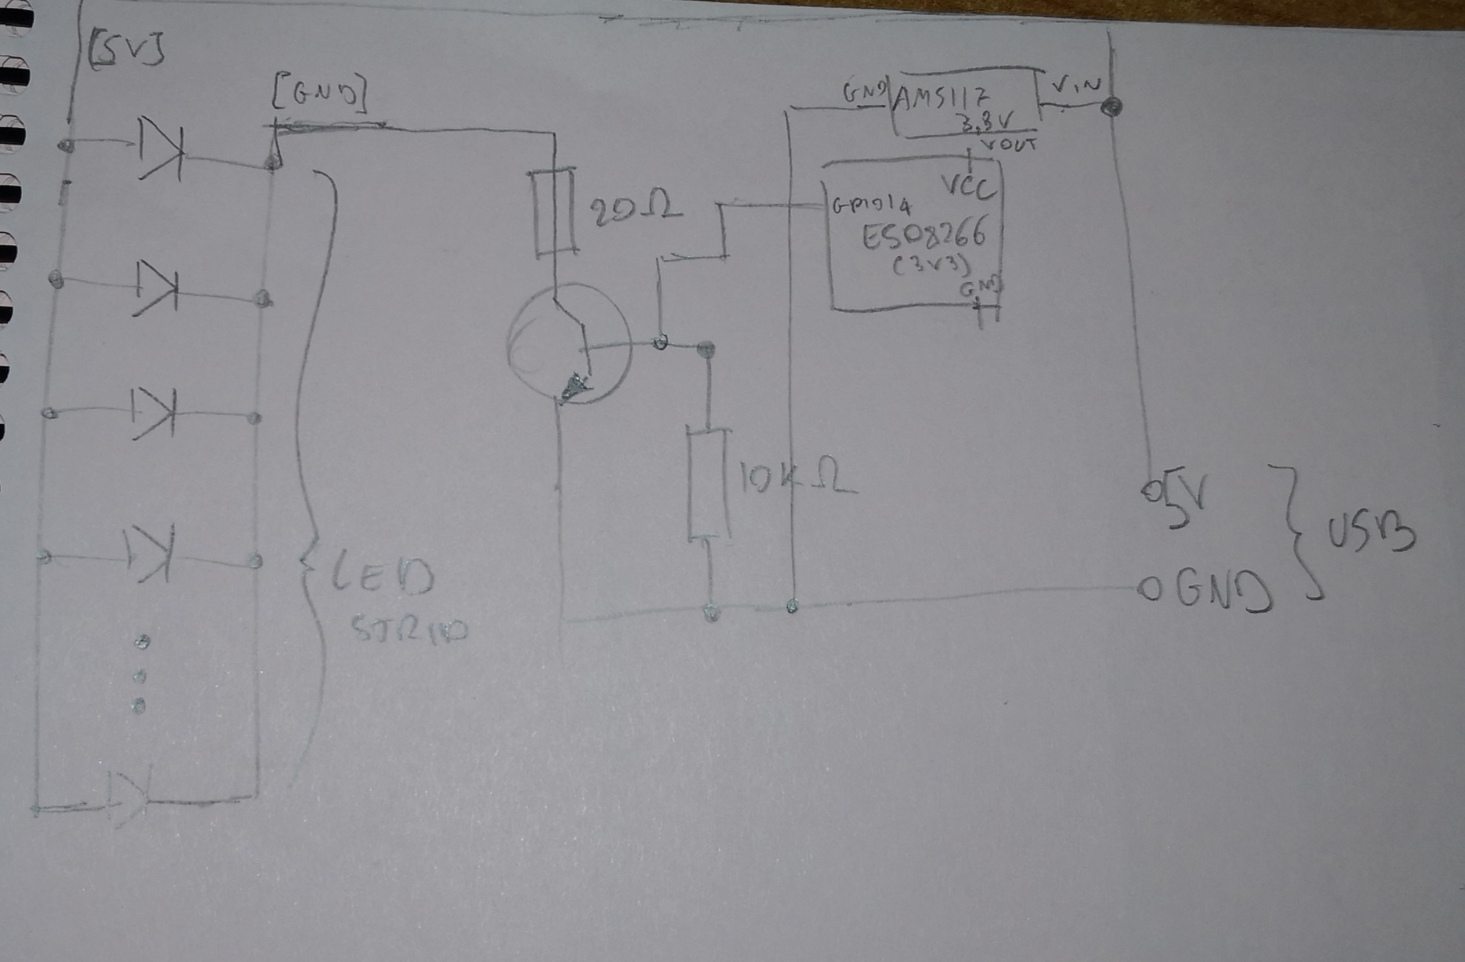
##LED strip controller using transistor
Now that the Thinger.io connection has been successfully set up it’s fairly easy to adapt for any projects, as in the example that follows.
#include <ThingerESP8266.h>

#include <ESP8266WiFi.h>
#include <ESP8266mDNS.h>
#include <WiFiUdp.h>

#define USERNAME "yourUsername"
#define DEVICE_ID "yourDeviceId"
#define DEVICE_CREDENTIAL "yourDevCredential"

#define SSID "Your SSID"
#define SSID_PASSWORD "Your PSW"

#define CTRLPIN 14

ThingerESP8266 thing(USERNAME, DEVICE_ID, DEVICE_CREDENTIAL);

bool stat = false;

void setup() {
	pinMode(LED_BUILTIN, OUTPUT);
	pinMode(CTRLPIN, OUTPUT);
	thing.add_wifi(SSID, SSID_PASSWORD);

	thing["led"] << digitalPin(CTRLPIN);
}

void loop() {
	thing.handle();
}
The specific hardware implementation may vary. Below is a schematic of one such possible implementation.
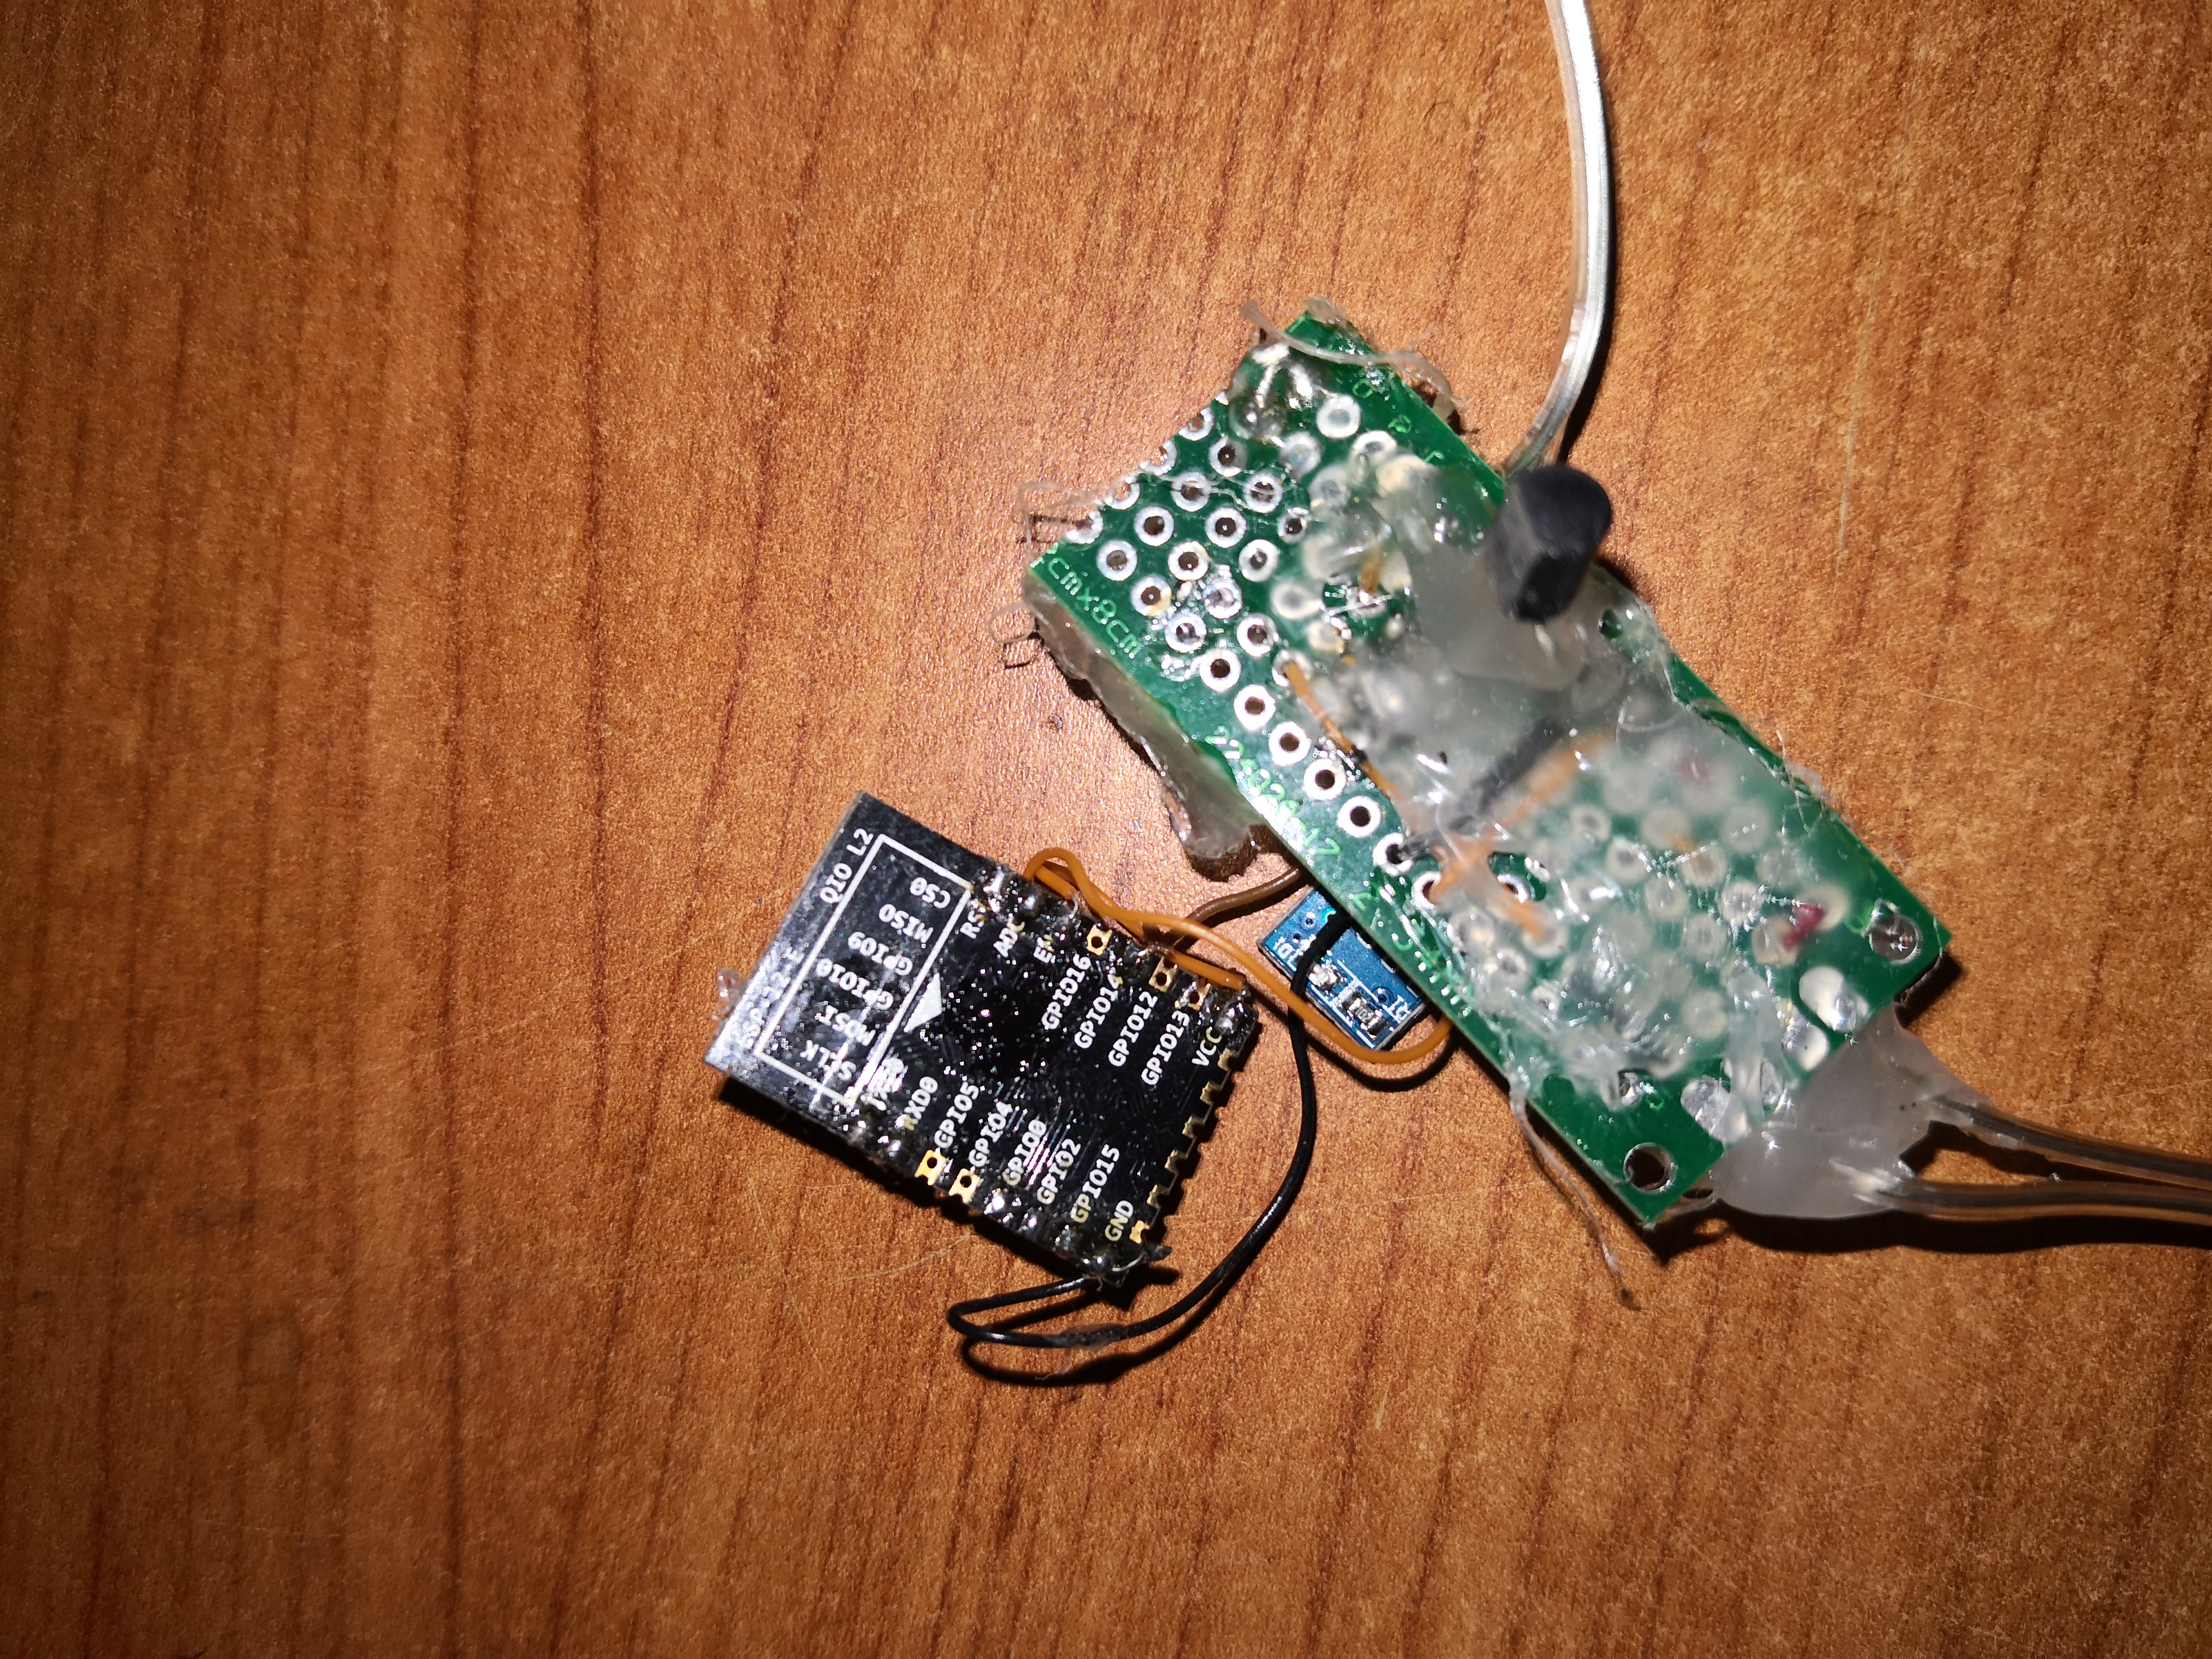
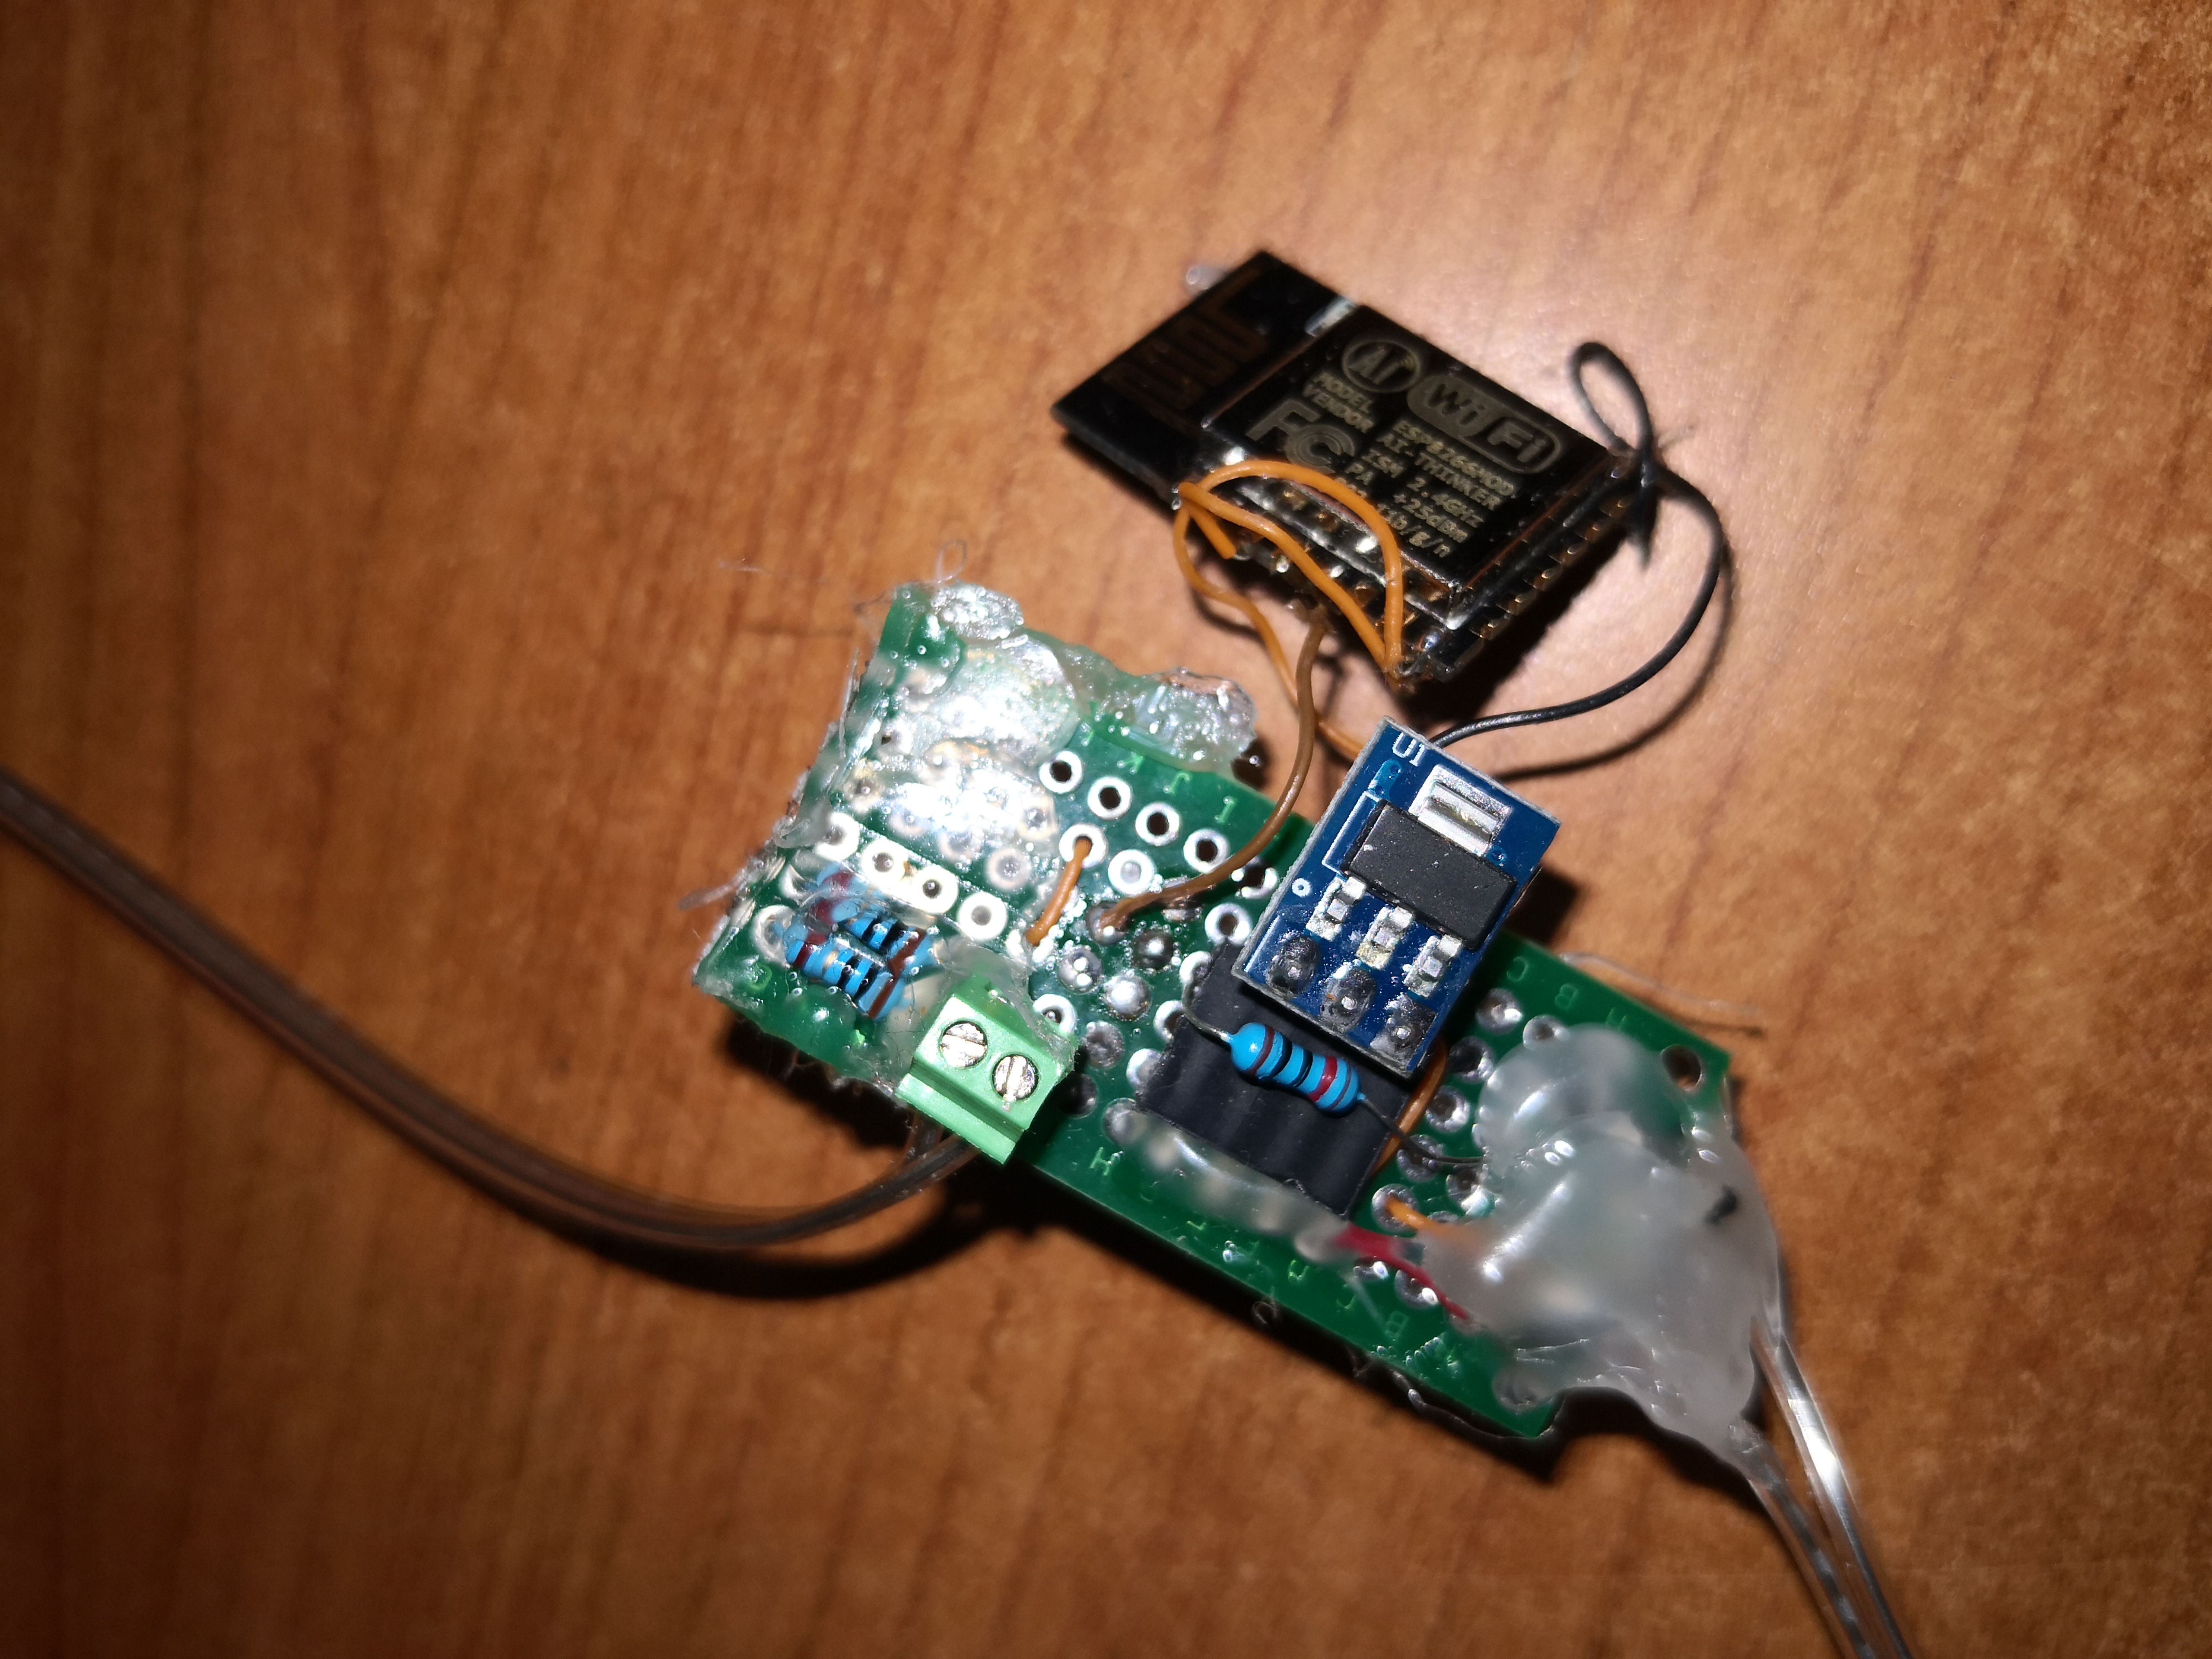
Yes, that is hot glue. Sadly I do not have any way to make any better a casing yet. This is all for now. Check in soon for more ESP8266 projects.